What is an SSH key?
SSH keys serve as a means of identifying yourself to an SSH server using public-key cryptography and challenge-response authentication. An SSH key comprises of two separate keys:
- A public key - which you can share freely with any SSH server
- A private key - which should be known only to you, and kept secret.
Why would you want an SSH key?
Here are some of the advantages of using SSH keys over traditional password authentication.
- Your password is never sent over the network. This eliminates the risk posed by brute-force password attacks.
- More convenience - You can connect to a server, or multiple servers, without having to remember or enter your password for each system (this may require use of the ssh-agent).
I’m going to cover OS X and Windows. Instructions for other forms of UNIX or Linux can follow along with OS X. If you want to install a new(er) version of SSH than what comes default in OS X, please see my article on OpenSSH, ECDSA, and OS X Mavericks . If you do this, you will be able to use ECDSA and ED25519 instead of just RSA/DSA. More information on ECDSA and ED25519 available on wikipedia.
OS X
Start by opening the Terminal application (Its hidden in the Utilities folder inside Applications. The keyboard shortcut to open the Utilities folder is cmd-shift-u). Once you have Terminal open, type in the following:
If you want ECDSA, do this:
1 ssh-keygen -t ecdsa
If you want ED25519, do this:
1 ssh-keygen -t ed25519
If you have a version of OpenSSH that supports ECDSA and ED25519, I recommend you generate those keys as well. The crypto is better. Support for ECDSA and ED25519 is not as common as RSA, so depending on what you’re wanting to connect to, you may need to fall back to using the RSA keys. I name my RSA keys and include the number of bits, in case I need to have more than one, I don’t want them to be confusing.
Make sure you enter a password.
If you’ve done it correctly, it should look similar to this:
 1	[louisk@iPwn louisk ]$ ssh-keygen -t rsa -b 4096
 2	Generating public/private rsa key pair.
 3	Enter file in which to save the key (/Users/louisk/.ssh/id_rsa): /Users/louisk/.ssh/id_rsa_4096
 4	Enter passphrase (empty for no passphrase):
 5	Enter same passphrase again:
 6	Your identification has been saved in /Users/louisk/.ssh/id_rsa_4096.
 7	Your public key has been saved in /Users/louisk/.ssh/id_rsa_4096.pub.
 8	The key fingerprint is:
 9	SHA256:uq0Qi+/gWaJPfFq/6aEwhhgw3mfJxhOSEF+A8f0IlIk louisk@iPwn
10	The key's randomart image is:
11	+---[RSA 4096]----+
12	| +=o+. |
13	| E=o+ |
14	|o * o |
15	|o.. = = |
16	|.. ..X .S |
17	|.+ .+o.. |
18	|o X * o |
19	| = % + = |
20	|..=.+.Bo. |
21	+----[SHA256]-----+
22	[louisk@iPwn louisk ]$ ssh-keygen -t ecdsa
23	Generating public/private ecdsa key pair.
24	Enter file in which to save the key (/Users/louisk/.ssh/id_ecdsa): /Users/louisk/.ssh/id_ecdsa
25	Enter passphrase (empty for no passphrase):
26	Enter same passphrase again:
27	Your identification has been saved in /Users/louisk/.ssh/id_ecdsa.
28	Your public key has been saved in /Users/louisk/.ssh/id_ecdsa.pub.
29	The key fingerprint is:
30	SHA256:3f7a/cdiuamJs8BWSFFJrVk/Fm2mzQfzYr4mtT3h4GU louisk@iPwn
31	The key's randomart image is:
32	+---[ECDSA 256]---+
33	| .ooo . |
34	| .. o + +|
35	| . + . @ |
36	| . oo. B =|
37	| S o .+ o.|
38	| . . . .oE |
39	| + o.=*.|
40	| . ....=B=+|
41	| oo+*=o*|
42	+----[SHA256]-----+
43	[louisk@iPwn louisk ]$ ssh-keygen -t ed25519
44	Generating public/private ed25519 key pair.
45	Enter file in which to save the key (/Users/louisk/.ssh/id_ed25519): /Users/louisk/.ssh/id_ed25519
46	Enter passphrase (empty for no passphrase):
47	Enter same passphrase again:
48	Your identification has been saved in /Users/louisk/.ssh/id_ed25519.
49	Your public key has been saved in /Users/louisk/.ssh/id_ed25519.pub.
50	The key fingerprint is:
51	SHA256:tQgwYlrUoVNr0L3ciULj2CdRYAS4c25u/J/ttqtAB/w louisk@iPwn
52	The key's randomart image is:
53	+--[ED25519 256]--+
54	| oB=O=. |
55	|.+ B*+. |
56	|..o==+.+ .. |
57	|o oo=o=.oo . |
58	| + .+E S . |
59	| o. . |
60	| + . |
61	| + . o. |
62	| . ...++=o |
63	+----[SHA256]-----+
64	[louisk@iPwn louisk ]$
If you wish to take advantage of the ssh-agent (I recommend you do, it comes in handy), you can start it (needs to be done once each time you boot your system) with the following (I keep my private keys in a subdirectory of my .ssh called keys. Its not required to have them there):
You should see output that looks like this:
1	[louisk@iPwn louisk ]$ ssh-add .ssh/keys/*
2	Enter passphrase for .ssh/keys/id_ecdsa:
3	Identity added: .ssh/keys/id_ecdsa (.ssh/keys/id_ecdsa)
4	Identity added: .ssh/keys/id_ed25519 (louisk@iPwn)
5	Identity added: .ssh/keys/id_rsa_4096 (.ssh/keys/id_rsa_4096)
6	[louisk@iPwn louisk ]$
If you want to know all of the identities currently being tracked by your ssh-agent, you can do:
It should produce output similar to this:
1	[louisk@iPwn louisk ]$ ssh-add -l
2	521 SHA256:Twj2uIDubB9E2PEI7a0ZeM+A2mHxfVxkQuG1bgo/E7c .ssh/keys/id_ecdsa (ECDSA)
3	256 SHA256:KnXk0r6NkBLaEWJwa9SMGsR/wcv+pvKvnBTfkIzRg1g louisk@iPwn (ED25519)
4	4096 SHA256:3VktBMk0LuH7ZIVhVi9gvei5HrFRvjBW7cNJ/jVtKag .ssh/keys/id_rsa_4096 (RSA)
5	[louisk@iPwn louisk ]$
You are now ready to have your public key deployed to servers or devices. Don’t copy your private key to other servers or devices. In addition to not working, it will destroy the security of your private key and you will have to make a new one. Keep your private key private.
If all has gone smoothly so far, you should be able to ssh to the computer, or device that your public key has been installed on and you should be logged in directly with out being prompted for a password (your password was entered to the ssh-agent). Here is an example of logging into a Juniper Networks device:
1	[louisk@iPwn louisk ]$ ssh 10.0.0.2
2	--- JUNOS 14.1X53-D15.2 built 2014-12-20 23:24:56 UTC
3	{master:0}
4	louisk@swt01>
Congratulations, you win!
Windows
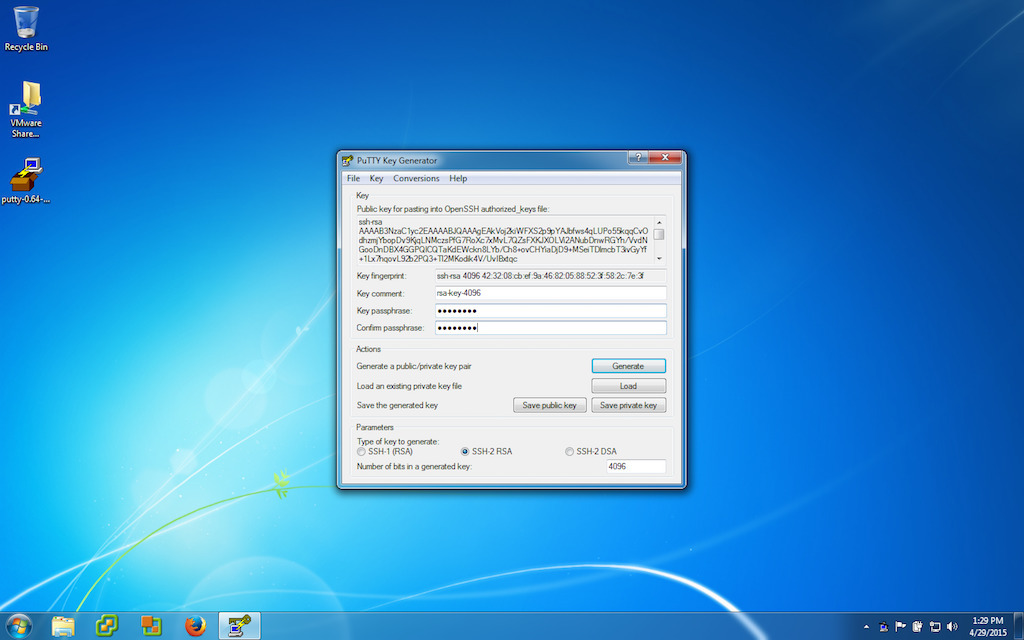
There are 2 common ways to use SSH on Windows (Is it really the only platform that doesn’t offer a native SSH client?): PuTTY, and Cygwin . Installing Cygwin will leave you with a commandline that looks like UNIX or Linux and you can follow the instructions above. PuTTY is a collection of GUI apps for the different functions (SSH client, agent, etc). You can find PuTTY here . I recommend reading the recent news, it may apply to you. I also recommend downloading the installer as it includes all the necessary apps in a single easy to install package. PuTTY only supports RSA and DSA keys. If you need something more secure on Windows, you need to install Cygwin.
Because PuTTY is graphical, here is the collection of screenshots that go with the steps.

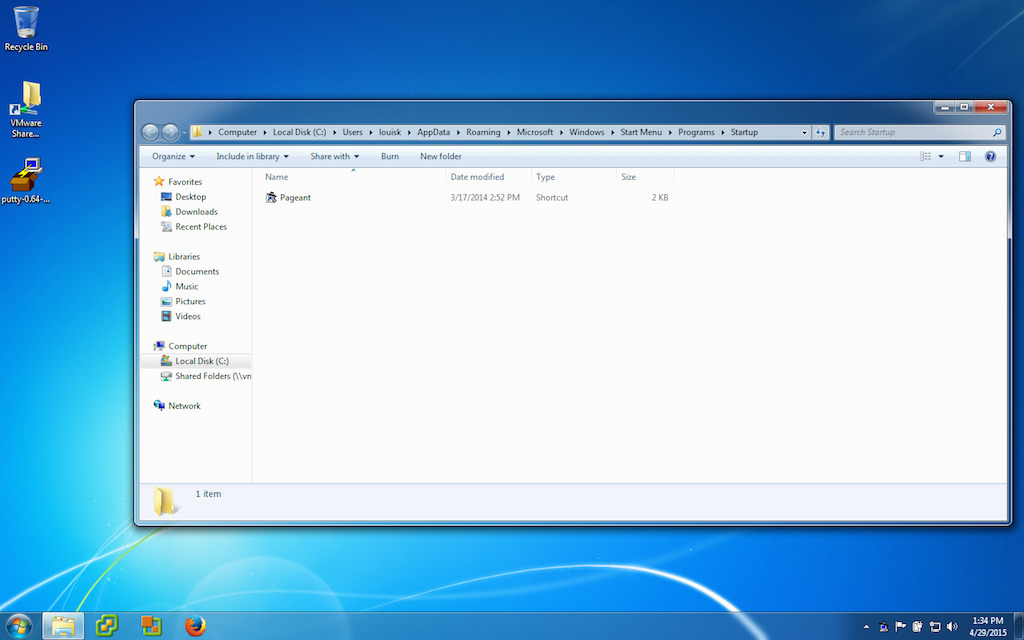
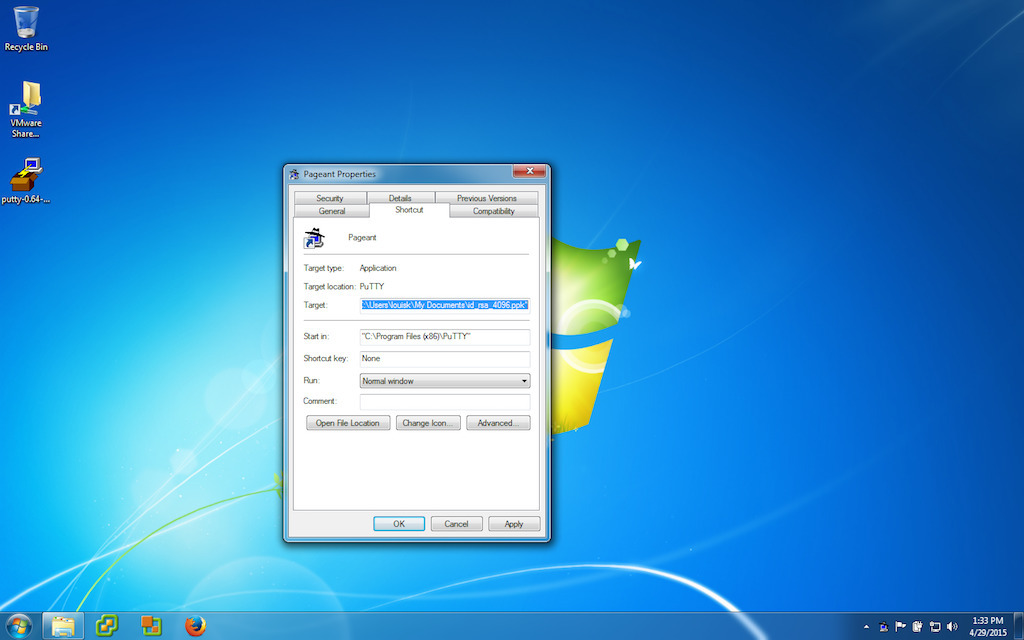
Customize the shortcut you just created so that Peagent will load your ssh key when
you login. This will contain the path to the Peagent.exe file and also the path to
your ssh private key. Both should be in double quotes
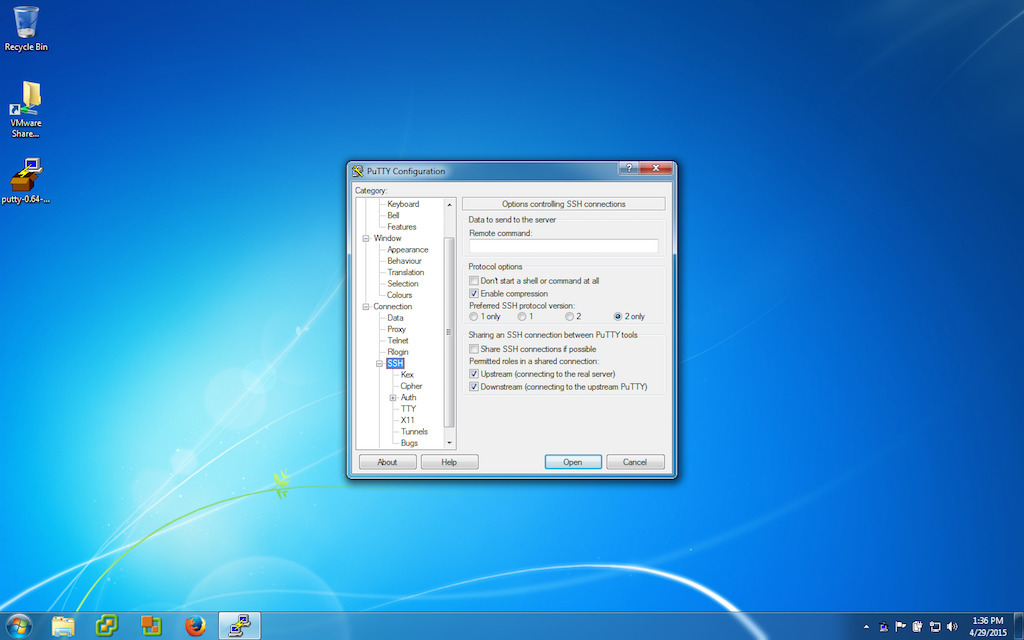
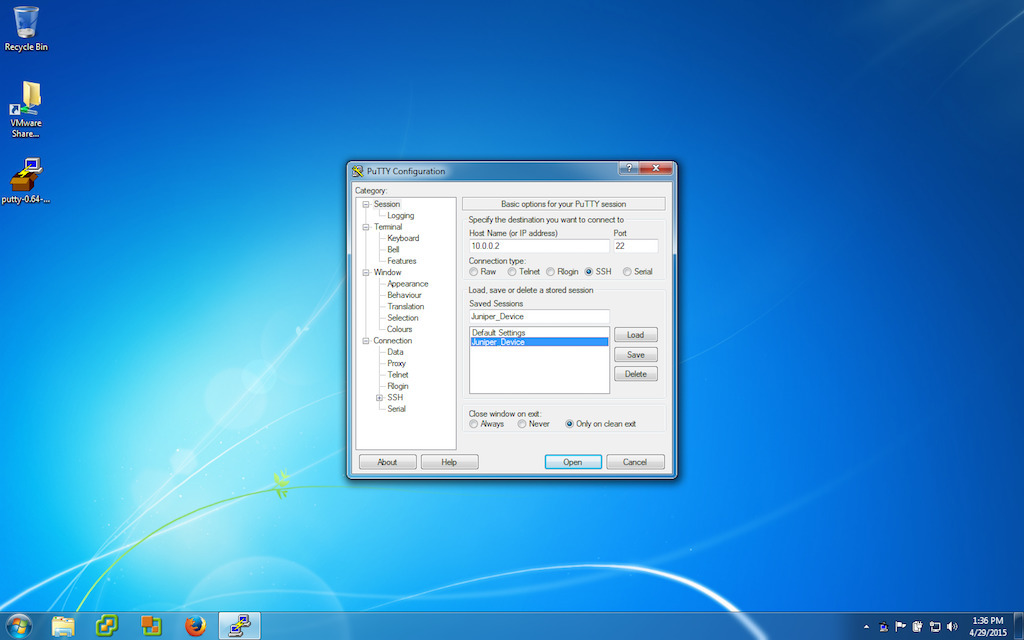
Now its time to setup PuTTY with our hosts. First we configure the defaults we want to use (things like compression, algorithms, etc). Then we setup which hosts to connect to, and then lastly, save it. The last part you will repeat for each host you want to be able to quickly connect to. Start by opening PuTTY.
Picking protocols and compression for ssh
Picking encryption algorithms

Setting up a host and saving it
You are now ready to have your public key deployed to servers or devices. Don’t copy your private key to other servers or devices. In addition to not working, it will destroy the security of your private key and you will have to make a new one. Keep your private key private. Lastly, you can now (assuming peagent is running, you should see it in the system tray), right click on the peagent icon, go to sessions, and select the session you wish to connect to.

If everything has gone smoothly, you should be able to choose a session and have PuTTY log you in with out asking for a password.
If you are looking for ways to improve the security of SSH, check out Securing the Secure Shell

Comments